In this article, we’ll show you how to install GA Connector tracking code on your website
To start tracking, please put this script on your website:
|
1 2 |
<script src="https://track.gaconnector.com/gaconnector.js" type="text/javascript"></script> <script type="text/javascript">gaconnector2.track('YOUR GA CONNECTOR ACCOUNT ID');</script> |
But instead of YOUR GA CONNECTOR ACCOUNT ID, please use the account ID that we have provided during the signup process. If you haven’t received yours yet, please email [email protected].
WordPress
If you’re using WordPress:
- Download our plugin here.
- Go to WordPress admin panel -> Plugins -> Add New -> Upload Plugin, choose file ga-connector-2.0.zip and then activate it.

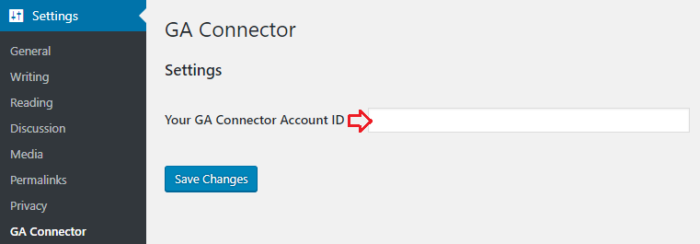
- Go to Settings – GA Connector and set your GA Connector ID. If you haven’t received yours yet, please email [email protected].

Placement Requirements
- This code should ideally be put in the very beginning of the <body> tag, or in the <head>. If it’s put in the middle or at the end of <body>, some visitors who don’t wait until the whole page loads, won’t be tracked correctly.
- The code needs to be put on every page of the website, or at least on every page that can potentially the first one that user opens on the website.
Integrating with GA Connector if your form is inside a cross-domain iframe
If your website forms are located inside a cross-domain iframe, add this JavaScript code inside that iframe (in addition to the tracking code above on the main page):
|
1 2 |
<script src="https://track.gaconnector.com/gaconnector-iframe.js" type="text/javascript"></script> <script type="text/javascript">gaconnector2.track('YOUR GA CONNECTOR ACCOUNT ID');</script> |
Integrating with multiple domains
If you’re using multiple domains, you should replace the second line of the GA Connector code with this (but use your own domain names instead of domain1.com and domain2.com; also, feel free to add more domains):
|
1 |
<script type="text/javascript">gaconnector2.track("YOUR GA CONNECTOR ACCOUNT ID",{internalDomains:["domain1.com","domain2.com"], storageEngine: 'cookies'});</script> |

