In order for you to see analytics data for your Zoho CRM leads, you need to modify your Zoho Webforms.
You need to add additional fields to your Zoho Webforms and give them specific names. So that GA Connector script can recognize these fields and save its analytics information into these fields.
Install GA Connector Fields extension for Zoho CRM
First, open this link and install GA Connector Fields extension (pick “Install for all users”).
This extension contains custom fields that will be used to collect website visitor source information.
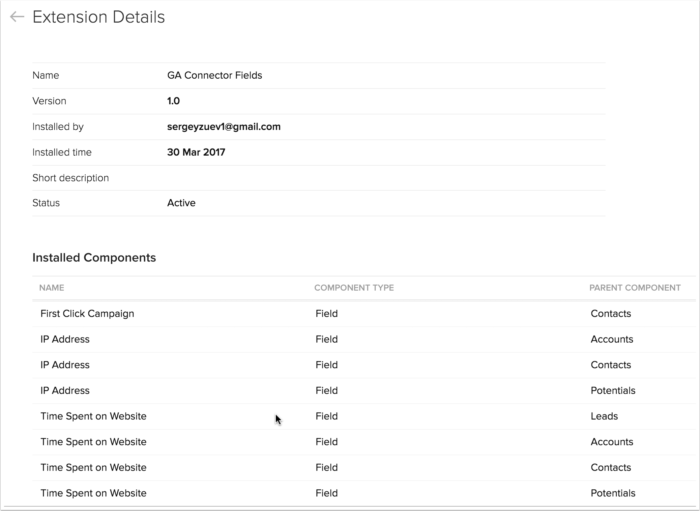
After the installation, the extension contents will look something like this inside your Zoho CRM:
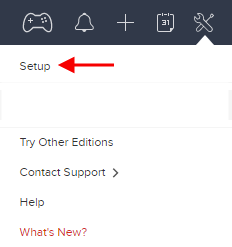
Go to Zoho CRM, Click on “Settings” and then select “Setup”.
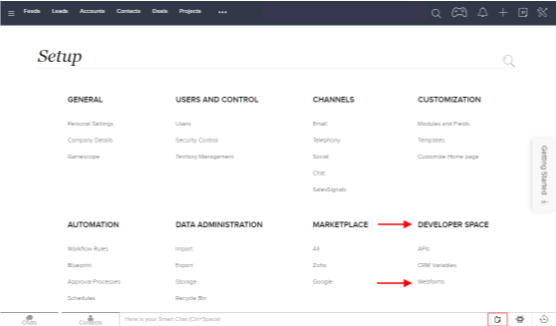
Under Developer Space, Select Webforms.
You should be able to see the webform editor that looks something like this:
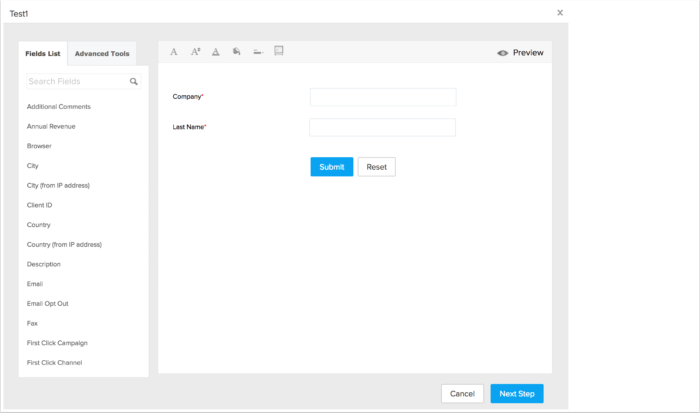
In the “Fields List”, find the following fields you want to apply and drag them to the form editor:
| All Traffic Sources | Last Click Campaign |
| Browser | Last Click Channel |
| City (from IP address) | Last Click Content |
| Country (from IP address | Last Click Landing Page |
| First Click Campaign | Last Click Medium |
| First Click Channel | Last Click Referrer |
| First Click Content | Last Click Source |
| First Click Landing Page | Last Click Term |
| First Click Medium | Last Click Timestamp |
| First Click Referrer | Latitude |
| First Click Source | Longitude |
| First Click Term | Region |
| First Click Timestamp | Time Zone |
| Google Analytics CID | Device |
| Google Analytics Measurement ID | Operating System |
| Google Analytics Session ID | Time Spent on Website |
| Google Click Identifier | Number of Website Visits |
| IP Address | Pages Visited |
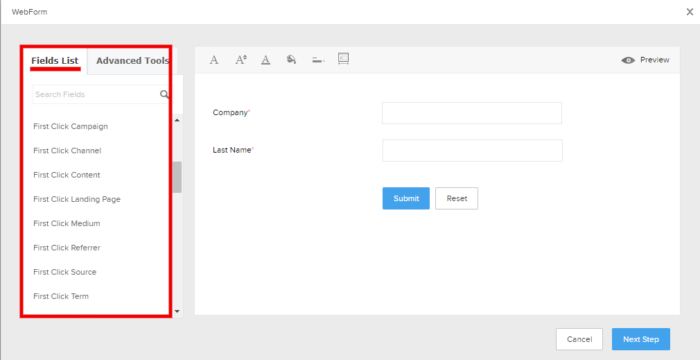
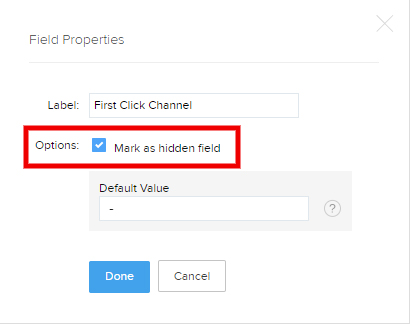
For each field, click on the gear icon

And make each of the new fields you’ve added hidden and use “-” as Default Value
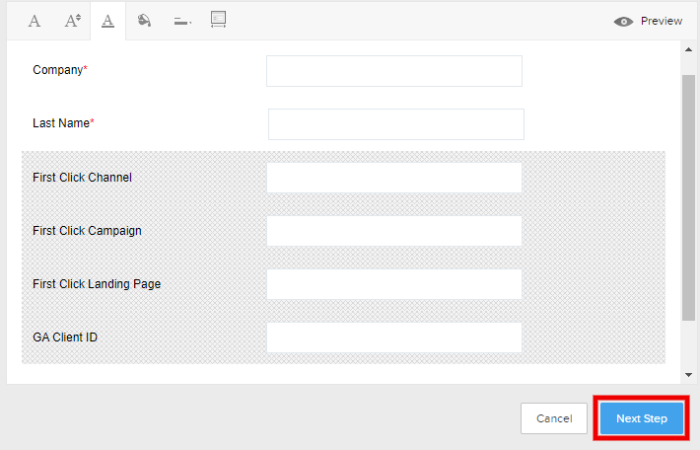
After you’re done, click “Next Step”
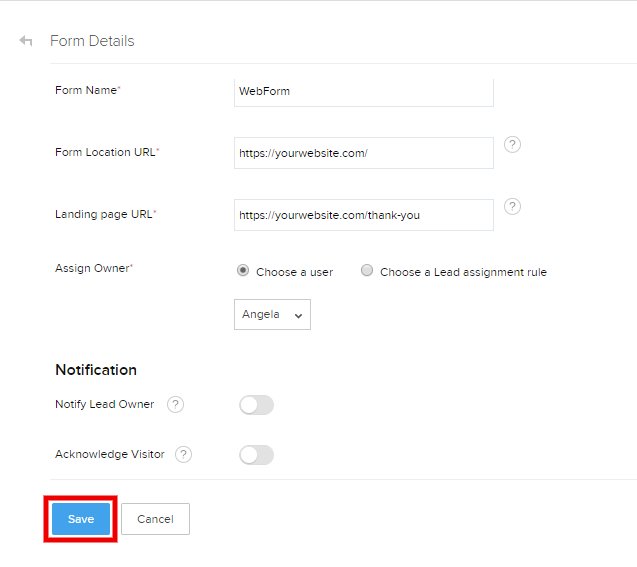
Fill out the fields on the next page to complete the webform setup and then click Save.
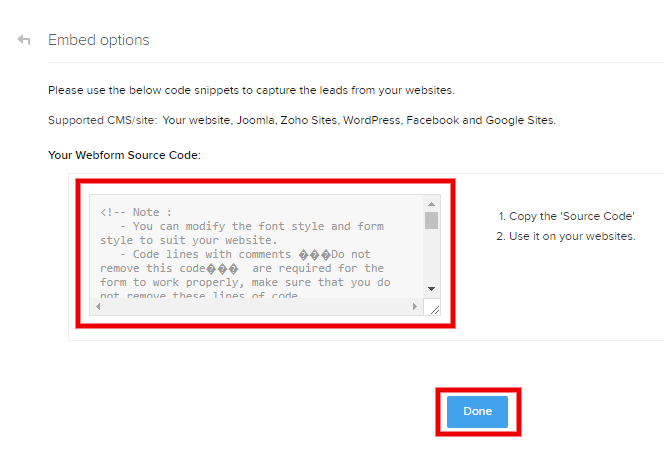
You will then be shown Embed options where you can now copy the WebForm code and then you can click on Done.
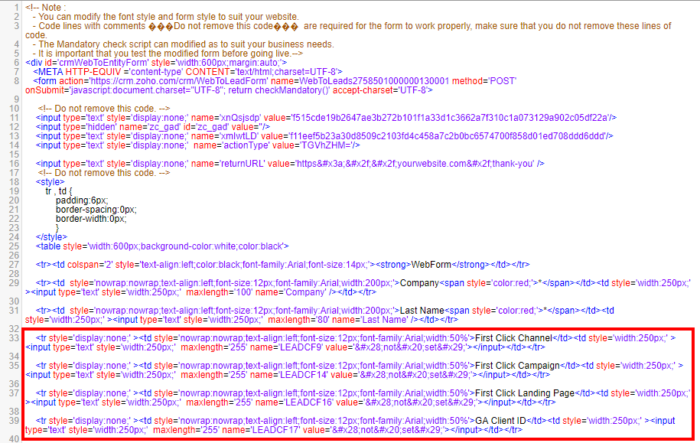
Inside the webform code, you will find the hidden GA Connector fields you’ve just added (e.g. First Click Channel, First Click Campaign, First Click Landing Page and GA Client ID)
For the GA Connector fields to work, these input fields needs an “id” attribute like the image below:
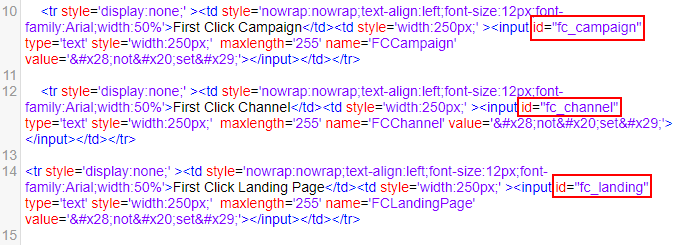
To do so, copy and paste the GA Connector ‘id’ attributes provided below within the <input> tag for each field you will be using.
| Label | Input ID | Label | Input ID |
|---|---|---|---|
| All Traffic Sources | all_traffic_sources | Last Click Campaign | lc_campaign |
| Browser | browser | Last Click Channel | lc_channel |
| City (from IP address) | city | Last Click Content | lc_content |
| Country (from IP address) | country | Last Click Landing Page | lc_landing |
| First Click Campaign | fc_campaign | Last Click Medium | lc_medium |
| First Click Channel | fc_channel | Last Click Referrer | lc_referrer |
| First Click Content | fc_content | Last Click Source | lc_source |
| First Click Landing Page | fc_landing | Last Click Term | lc_term |
| First Click Medium | fc_medium | Last Click Timestamp | lc_timestamp |
| First Click Referrer | fc_referrer | Longitude | longitude |
| First Click Source | fc_source | Latitude | latitude |
| First Click Term | fc_term | Number of Website Visits | page_visits |
| First Click Timestamp | fc_timestamp | Operating System | OS |
| Google Analytics CID | GA_Client_ID | Device | device |
| Google Analytics Measurement ID | GA_Measurement_ID | Region | region |
| Google Analytics Session ID | GA_Session_ID | Pages Visited | pages_visited_list |
| Google Click Identifier | gclid | Time Spent on Website | time_passed |
| IP Address | ip_address | Time Zone | time_zone |
Example:

After that, you new Zoho CRM leads will contain GA Connector tracking information (provided that you’ve also added our script or our plugin on your website).

