This guide shows you how to track UTM parameters in Salesforce Web-to-Lead forms.
Salesforce Web-to-Lead forms are great at creating leads in Salesforce for each submission. But they don’t tell you where your leads come from.
- What websites referred them?
- Which Adwords keyword brought them to your site?
- Which Facebook ad campaign converted them?
Overview of tracking UTM parameters in Salesforce Web-to-Lead forms
In this article we’re going to explain how you can track UTM parameters in Salesforce and have a section like this for each of your Leads:

Example of tracking UTM parameters in Salesforce Web-to-Lead forms
You’ll also be able to build Salesforce dashboards with UTM information.
As a result, you’ll see which campaigns generated the most sales:
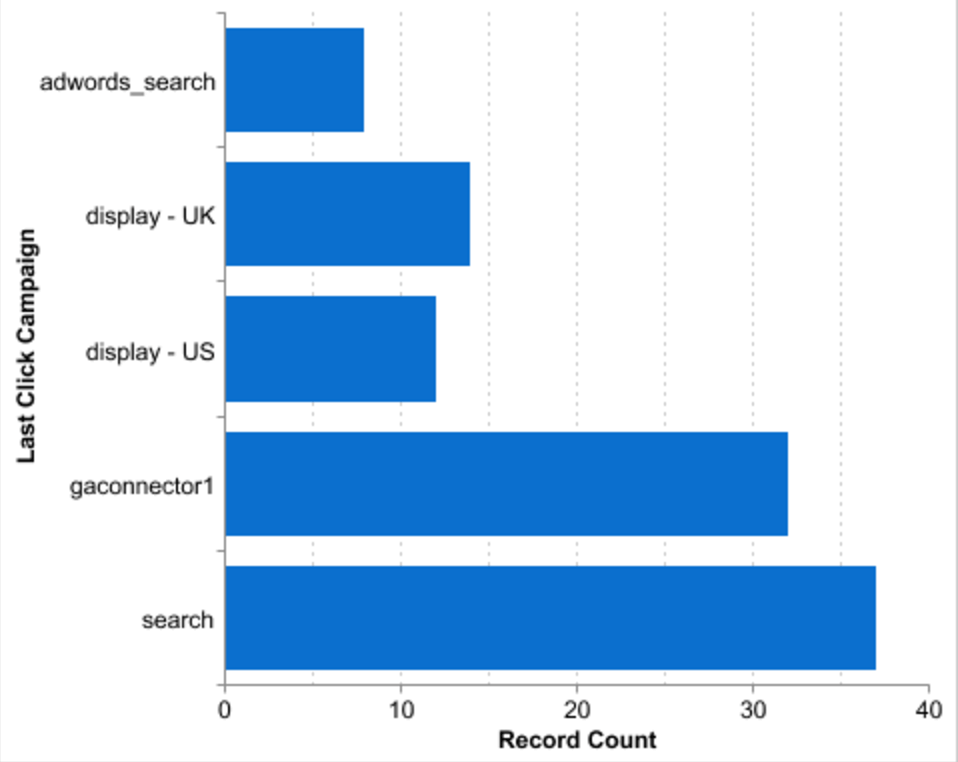
Salesforce report breaking out the number of qualified leads by Adwords campaign
Let’s say this is your Web-to-Lead form:
|
1 2 3 4 5 6 7 8 9 10 11 12 13 14 15 |
<form action="https://www.salesforce.com/servlet/servlet.WebToLead?encoding=UTF-8" method="POST"> <input type=hidden name="oid" value="00D58000000Kwkv"> <input type=hidden name="retURL" value="http://gg.com"> <label for="first_name">First Name</label><input id="first_name" maxlength="40" name="first_name" size="20" type="text" /><br> <label for="last_name">Last Name</label><input id="last_name" maxlength="80" name="last_name" size="20" type="text" /><br> <label for="email">Email</label><input id="email" maxlength="80" name="email" size="20" type="text" /><br> <label for="company">Company</label><input id="company" maxlength="40" name="company" size="20" type="text" /><br> <label for="city">City</label><input id="city" maxlength="40" name="city" size="20" type="text" /><br> <label for="state">State/Province</label><input id="state" maxlength="20" name="state" size="20" type="text" /><br> <input type="submit" name="submit"> </form> |
This is just an example – yours will look differently.
To bring UTM fields to Salesforce, you need to do three things:
- Add new fields to Salesforce that will store these UTM fields.
- Add these fields to your Web-to-Lead forms (and make them hidden).
- Add some JavaScript code to your page. This code will grab the UTM parameters and put them in the hidden fields.
Step 1 – Add new fields to Salesforce
First, you need to add five new custom fields to Salesforce: UTM Source, UTM Medium, UTM Term, UTM Campaign, UTM Content.
The JavaScript code in step 3 will fill in these fields with the appropriate values.
To create these fields, go to Salesforce and click Setup. This will open a search field. Search for the word “Lead” and select Fields from the results.
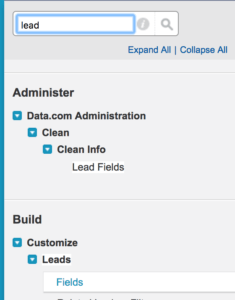
Salesforce Lead fields search screenshot
Then scroll down to Lead Custom Fields & Relationships and click New:
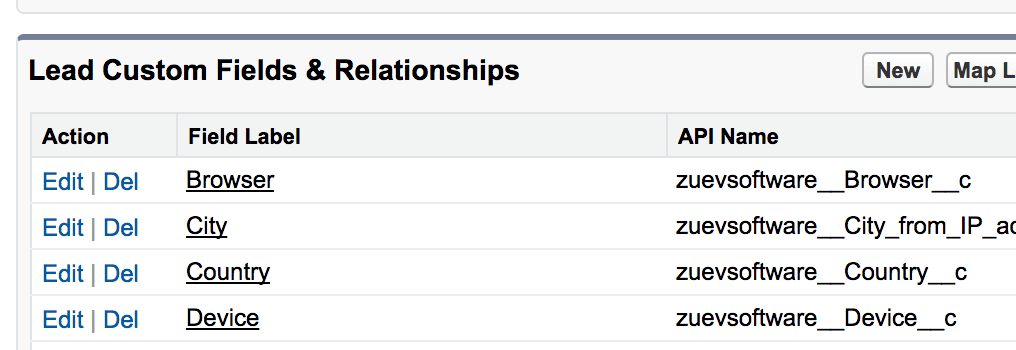
Custom Lead fields in Salesforce
Choose field type Text:

Salesforce – Choose new custom field type
Set Field label to “UTM Source”, and Length to 255 (Salesforce fills in Field Name for you):
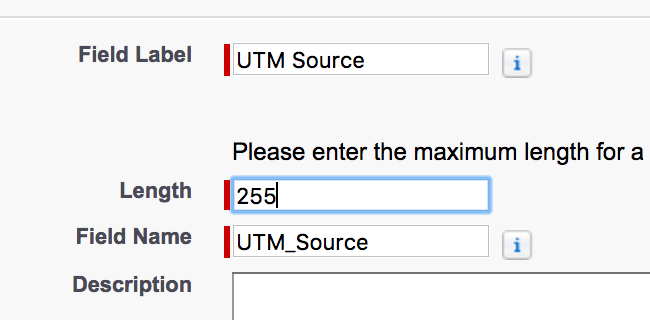
Set UTM source fields parameters in Salesforce
Click Next, and then Save & New.
Repeat this process four more times, creating the following fields:
- UTM Medium
- UTM Term
- UTM Campaign
- UTM Content
If you also want to know the source/medium/term/etc of each opportunity or account, do the following:
- Create the same fields for the Opportunity and/or Account object. You can do this in Setup -> Opportunities – Fields and Setup – Accounts – Fields.
- Go to Setup – Lead – Fields again, and click the button Map Lead Fields:
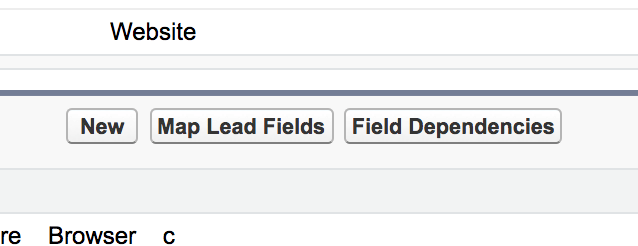
Salesforce – Map UTM fields from Lead to other objects
On this page, you will be able to map the Lead fields to the corresponding Account/Opportunity fields. This will add the UTM fields to the Account and/or Opportunity objects.
Step 2 – Add new fields to the forms
In step 1, you created custom fields to store UTM parameters in Salesforce. Now we’re going to add the same fields to your Web-to-Lead forms.
Generate the code for new fields in Salesforce
To do this, go to Salesforce – Setup – Web-to-Lead, and click “Create Web-to-Lead Form”:
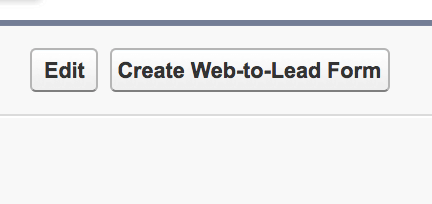
Salesforce Web-to-lead form create button
Find the UTM fields you just created in the “Available fields” section. Then, move them to “Selected Fields” using the arrow buttons between sections.
Click “Generate” and Salesforce will create a new Web-to-Lead form for you:
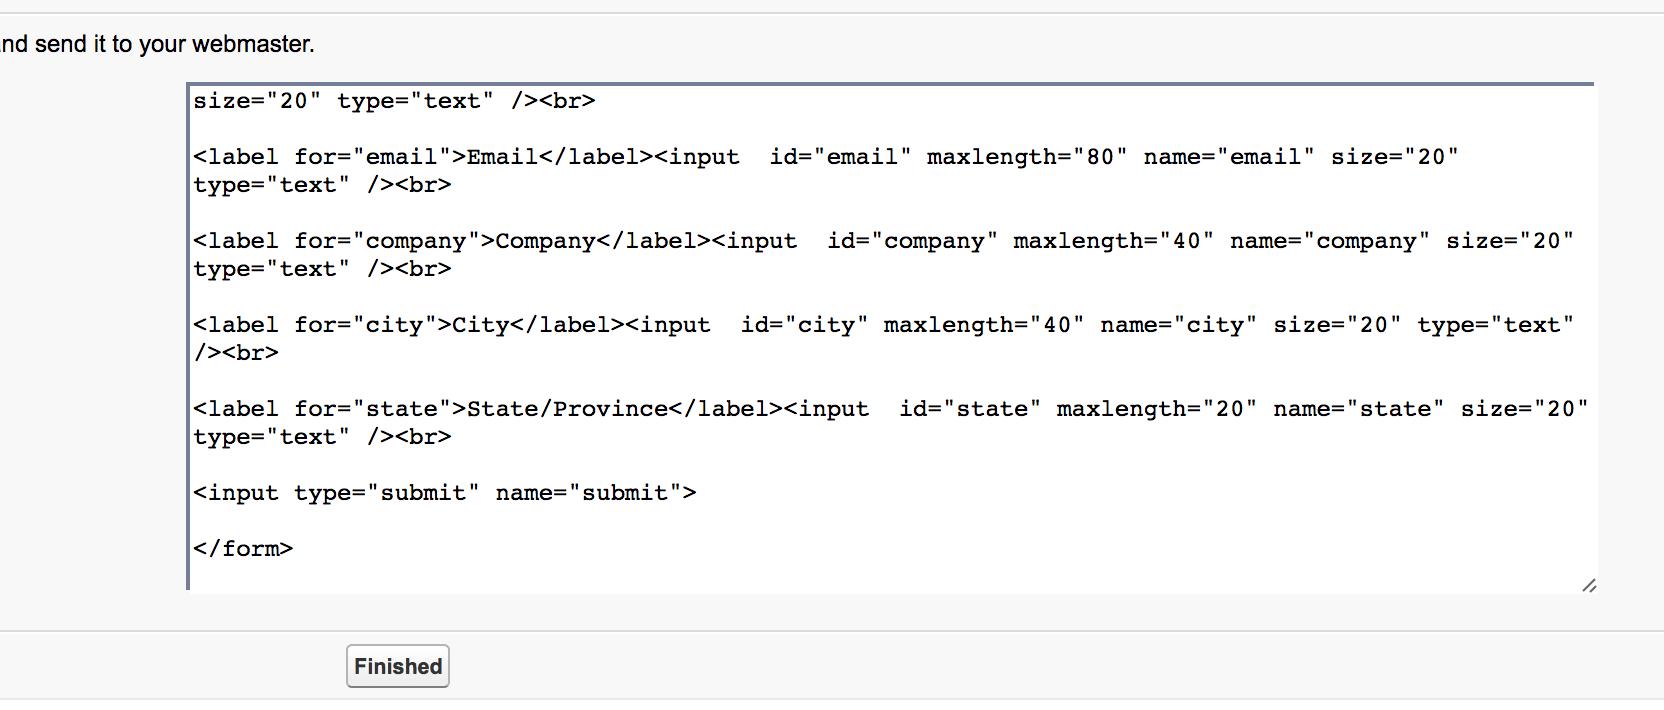
Sample Salesforce Web-to-Lead form
Don’t worry, you don’t need to replace your existing forms with this new form.
In the form just generated, you should see the following block of code:
|
1 |
UTM Source:<input id="00N5800000Bew3F" maxlength="255" name="00N5800000Bew3F" size="20" type="text" /><br> |
Put the code for the new fields in your form(s)
Take the input name (e.g. 00N5800000Bew3F) and add it to this template:
|
1 |
<input id="utm_source" name="00N5800000Bew3F" type="hidden" /> |
In this example, the input name is 00N5800000Bew3F, but in your form it will be different.
Repeat this process for all five fields, and as a result. Your end result should be a block of code like this:
|
1 2 3 4 5 |
<input id="utm_source" name="00N5800000Bew3F" type="hidden" /> <input id="utm_medium" name="00N5800000Bew3G" type="hidden" /> <input id="utm_campaign" name="00N5800000Bew3H" type="hidden" /> <input id="utm_term" name="00N5800000Bew3I" type="hidden" /> <input id="utm_content" name="00N5800000Bew3J" type="hidden" /> |
In this example, the input name is 00N5800000Bew3F, but in your form, it will be different.
Then put this block of code in your Web-to-Lead form, just above the closing </form> tag:
|
1 2 3 4 5 6 7 8 9 10 11 12 13 14 15 16 17 18 19 20 21 22 23 |
<form action="https://www.salesforce.com/servlet/servlet.WebToLead?encoding=UTF-8" method="POST"> <input type=hidden name="oid" value="00D58000000Kwkv"> <input type=hidden name="retURL" value="http://gg.com"> <label for="first_name">First Name</label><input id="first_name" maxlength="40" name="first_name" size="20" type="text" /><br> <label for="last_name">Last Name</label><input id="last_name" maxlength="80" name="last_name" size="20" type="text" /><br> <label for="email">Email</label><input id="email" maxlength="80" name="email" size="20" type="text" /><br> <label for="company">Company</label><input id="company" maxlength="40" name="company" size="20" type="text" /><br> <label for="city">City</label><input id="city" maxlength="40" name="city" size="20" type="text" /><br> <label for="state">State/Province</label><input id="state" maxlength="20" name="state" size="20" type="text" /><br> <!-- NEW FIELDS BEGIN --> <input id="utm_source" name="00N5800000Bew3F" type="hidden" /> <input id="utm_medium" name="00N5800000Bew3G" type="hidden" /> <input id="utm_campaign" name="00N5800000Bew3H" type="hidden" /> <input id="utm_term" name="00N5800000Bew3I" type="hidden" /> <input id="utm_content" name="00N5800000Bew3J" type="hidden" /> <!-- NEW FIELDS END --> <input type="submit" name="submit"> </form> |
Congratulations! You have completed the most time-consuming steps, 1 & 2. Only one more step to go!
At this point, you already have UTM fields in both Salesforce and your forms.
Plus, you don’t need to worry about synchronizing these fields because it happens automatically.
There’s just one missing piece. You need to insert the code that will populate these fields with actual UTM values.
Step 3 – Populate hidden fields with values (using JavaScript)
As a final step, put this JavaScript code somewhere on your page:
|
1 2 3 4 5 6 7 8 9 10 11 12 13 14 15 16 17 18 19 20 21 22 23 24 |
<script type="text/javascript"> function parseGET(param) { var searchStr = document.location.search; try { var match = searchStr.match('[?&]' + param + '=([^&]+)'); if (match) { var result = match[1]; result = result.replace(/\+/g, '%20'); result = decodeURIComponent(result); return result; } else { return ''; } } catch (e) { return ''; } } document.getElementById('utm_source').value = parseGET('utm_source'); document.getElementById('utm_medium').value = parseGET('utm_medium'); document.getElementById('utm_campaign').value = parseGET('utm_campaign'); document.getElementById('utm_term').value = parseGET('utm_term'); document.getElementById('utm_content').value = parseGET('utm_content'); </script> |
You can put it inside a Google Tag Manager tag if you’d like.
Congratulations! You have completed the most time-consuming steps, 1 & 2. Only one more step to go!
By now, you already have UTM fields both in Salesforce and your forms.
Plus, these fields get automatically synchronized. So you don’t need to worry about that.
There’s just one missing piece left. You need to insert the code that will populate these fields with actual UTM values.
Bonus Step 4
If you’ve followed this guide and and implemented, you’re already ahead of most marketers out there.
If you want to go one step further, you can implement GA Connector – a tool that allows you to find out even more about your clients.
You see, tracking only UTM parameters has its limitations:
- It doesn’t work when users leave your page and then return from a bookmark or by typing your URL. UTM information is lost for these leads (unless you use a tool like GA Connector).
- It also doesn’t work if you have a multi-page website: if a user lands on one of your pages, but the actual form submission happens on another page, the UTM information is lost.
- This approach only tells you which channel converted the lead. But sometimes it takes more than one visit to seal the deal and thus there could be more than one channel. You user could have found you through Google but came back through Facebook remarketing. Does it make sense to attribute the conversion only to remarketing?
- This approach doesn’t let you track organic Google searches. You can’t put UTM parameters there. Same with referrals that you don’t control (not everyone wants to put UTM parameters in their links).
- This method doesn’t give you other important information about your customers: which device/browser they are using, their referrer, where are they located etc. These are all important clues that can be valuable during the sales process and for analytics.
GA Connector solves all those issues. It allows you to trace the user’s entire path, no matter which page they landed on and when they submitted the form.
GA Connector remembers the initial channel, as well as the last channel, plus other useful information about this visitor.
Here is a section you will see for each of your Salesforce leads after implementing GA Connector:
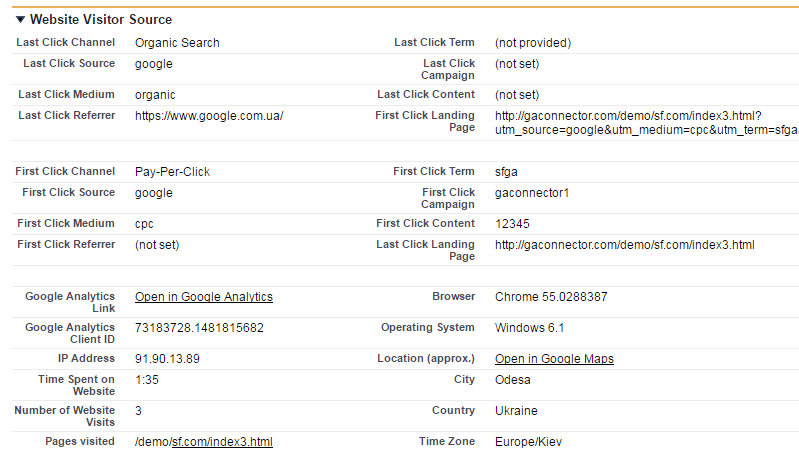
GA Connector: Tracking website visitor information inside Salesforce
Sign up for GA Connector here.

Sergii Zuiev is the founder of GA Connector, a marketing attribution platform helping sales and marketing teams track revenue back to the channel, campaign, and keyword level. With a background in PPC and marketing technology, he built GA Connector in 2015 after experiencing firsthand the frustration of not knowing which ads actually drove revenue, and turned that insight into a product now used by hundreds of companies globally.

