Saving GCLID (Adwords click ID) to Salesforce is an essential part of Salesforce & Adwords integration. In this article, we’ll show you step-by-step how you can do this.
Step 1 – Make sure that Adwords adds GCLID to ad URLs
All you need to do is make sure that auto-tagging is enabled for your Adwords account. In case it’s not, you can do so using these steps:
- Sign in to your Google Ads account.
- In the left page menu, click Settings.
- Click Account settings along the top of the page.
- Click the Auto-tagging section.
- To enable auto-tagging, check the box next to “Tag the URL that people click through from my ad.”
- Click Save.
Step 2 – Create GCLID fields in Salesforce
Create 4 GCLID fields in Salesforce: for Lead, Opportunity, Account and Contact objects. Feel free to skip objects you’re not using.
Make sure to create Text fields with Length=255. They should look something like this:
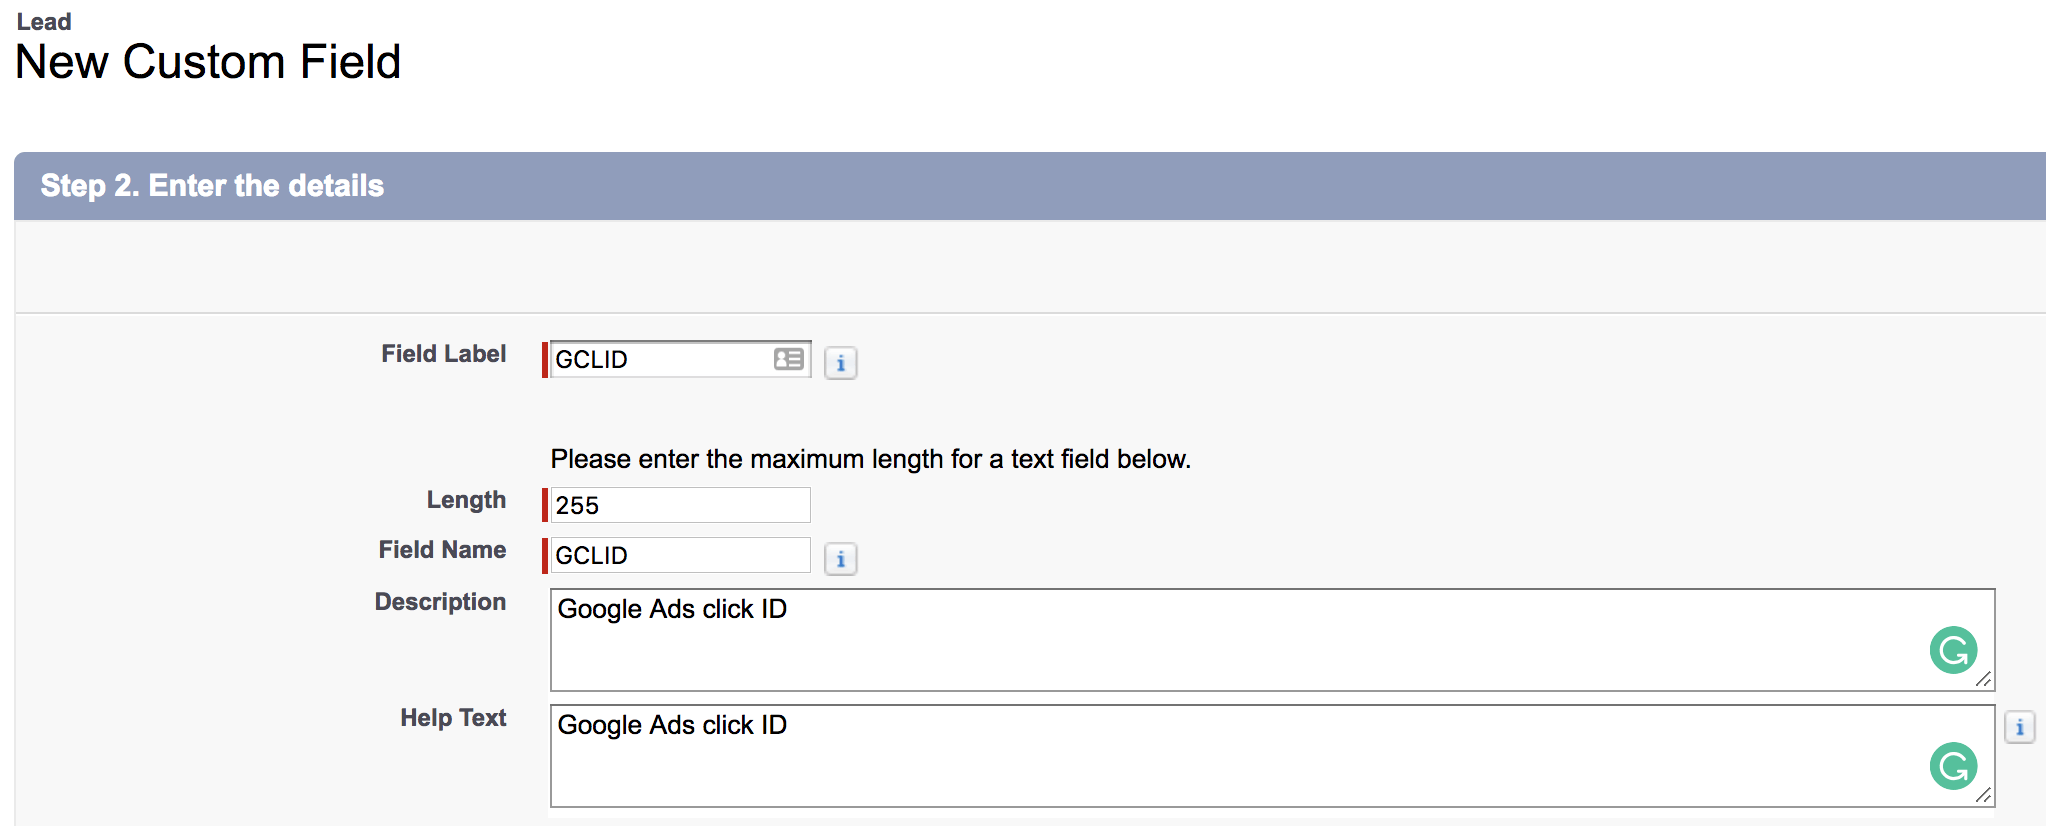
Create GCLID field in Salesforce
Step 3 – Add GCLID hidden field to your forms
Add a hidden field to your forms that looks like this:
<input type=”hidden” id=”gclid”>
Make sure to connect this field with the Salesforce GCLID field you’ve just created.
Step 4 – Add a script that will populate the GCLID hidden field
This script will find a hidden field with id “gclid” and populate it with the actual value of gclid parameter:
|
1 2 3 4 5 6 7 8 9 10 11 12 13 14 15 16 17 18 19 20 21 22 23 24 25 26 27 28 29 30 31 32 33 34 35 36 37 38 39 |
<script type="text/javascript"> function setCookie(name, value, days) { var date = new Date(); date.setTime(date.getTime() + (days * 24 * 60 * 60 * 1000)); var expires = "; expires=" + date.toGMTString(); document.cookie = name + "=" + value + expires + ";path=/"; } function getParam(p) { var match = RegExp('[?&]' + p + '=([^&]*)').exec(window.location.search); return match && decodeURIComponent(match[1].replace(/\+/g, ' ')); } var gclid = getParam('gclid'); if (gclid) { var gclsrc = getParam('gclsrc'); if (!gclsrc || gclsrc.indexOf('aw') !== -1) { setCookie('gclid', gclid, 90); } } function readCookie(name) { var n = name + "="; var cookie = document.cookie.split(';'); for (var i = 0; i < cookie.length; i++) { var c = cookie[i]; while (c.charAt(0) == ' ') { c = c.substring(1, c.length); } if (c.indexOf(n) == 0) { return c.substring(n.length, c.length); } } return null; } window.onload = function() { document.getElementById('gclid').value = readCookie('gclid'); } </script> |
It’s best to put it before the closing </body> tag.
Want to learn more about Salesforce & Adwords integration?
You can read our blog post to learn about our Salesforce & Adwords integration.
Also, feel free to contact us if you’d like us to help set up this integration for you.

Sergii Zuiev is the founder of GA Connector, a marketing attribution platform helping sales and marketing teams track revenue back to the channel, campaign, and keyword level. With a background in PPC and marketing technology, he built GA Connector in 2015 after experiencing firsthand the frustration of not knowing which ads actually drove revenue, and turned that insight into a product now used by hundreds of companies globally.

