This article is intended for GA Connector clients who have multiple Google Analytics properties, and want to configure all of them to properly receive, store and show data from your CRM system.
This article assumes that you already have one GA property configured (we’ll call it source property), and want to move this configuration to others (we’ll call the destination properties).
Here are the steps you should take to ensure you moved the configs without missing anything:
1. Make sure that all the destination Google Analytics properties use Universal Analytics, not Classic Analytics.
Here is how you can check if you use Universal Analytics:
- Visit Google Analytics
- Go to the ‘Admin’ area
- Under the property that will be using GA Connector you should NOT see “Universal Analytics upgrade”. If you do, it means that you still use Classic Analytics.
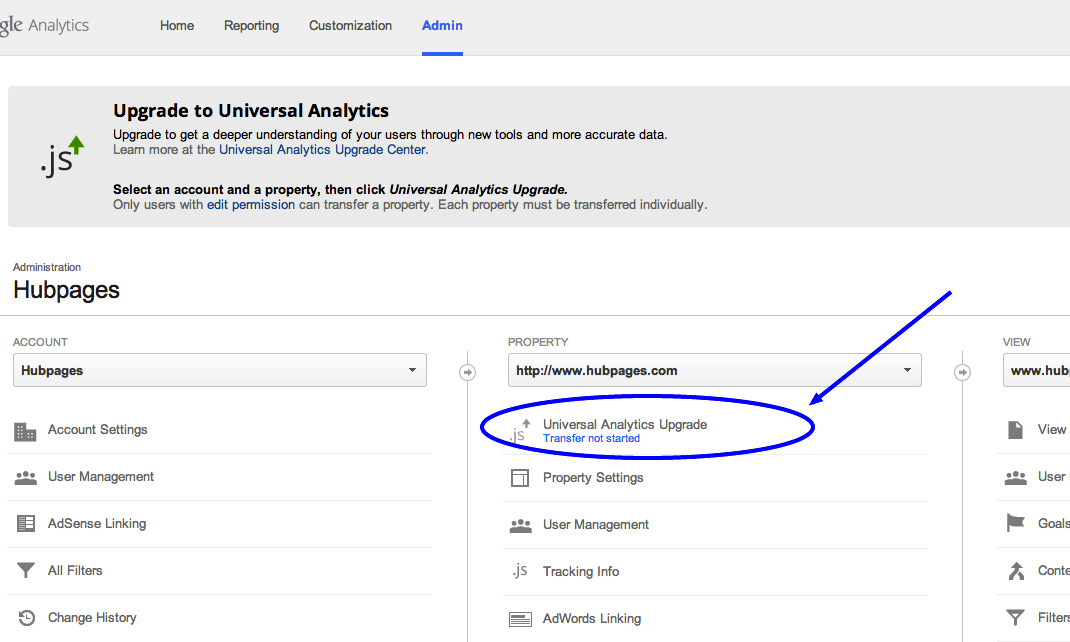
Screenshot 1
Alternatively, you can go to Google Analytics – Admin – Custom Definitions and see if that menu contains “Custom Metrics” and “Custom Dimensions”:
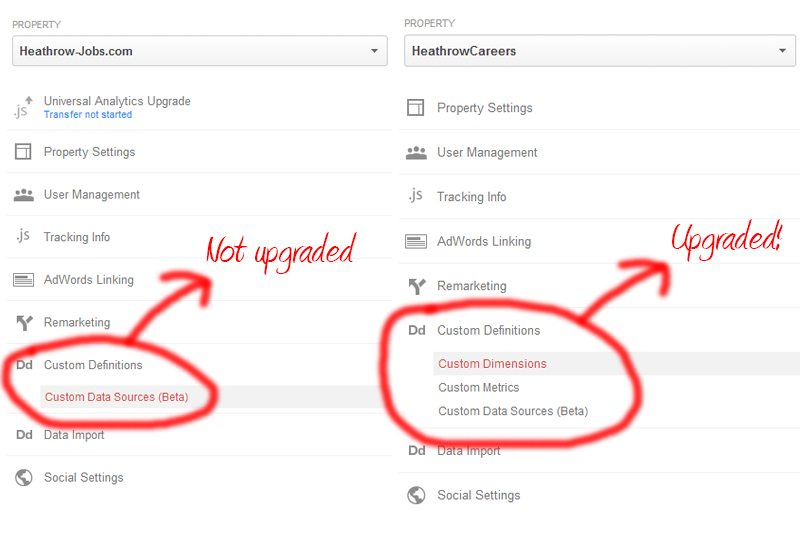
Screenshot 2
2. Copy custom dimensions.
First, go to the source Google Analytics property, and open Admin – Custom Definitions – Custom Dimensions.
You should be able to see something like this:
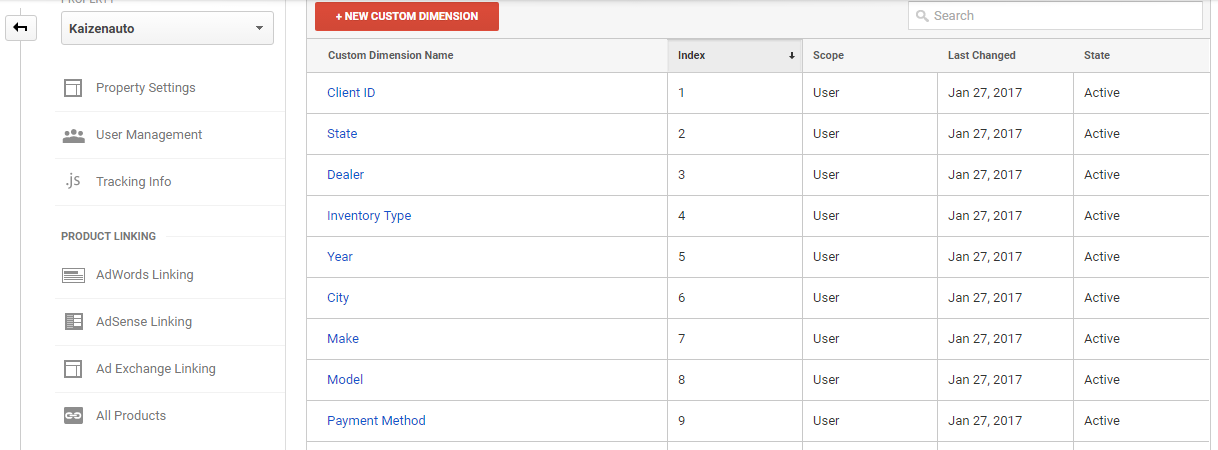
Screenshot 3
Then open the same page (Custom Dimension) for the destination property, and click the red button “New Custom Dimension”.
Then create custom dimensions with the same names, scopes and states as in the source property. Scope almost always should be “User” and the “Active” checkbox should be checked:
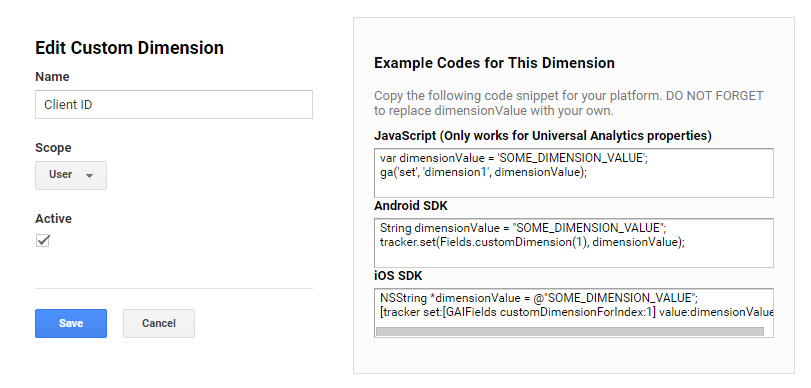
Screenshot 4
It’s also important that indexes of the custom dimensions match for source and destination properties. To check the indexes, see column 2 on the screenshot 3. These numbers should match the same dimension names for both source and destination properties.
So if “Client ID” has index “1” in the source property, it should have the same index in the destination property too. It’s important because GA Connector sends values to custom dimensions using their index, not name. Therefore, if the indexes are not consistent across properties, some custom dimensions will receive wrong values.
3. Copy custom metrics.
First, go to the source Google Analytics property, and open Admin – Custom Definitions – Custom Metrics.
You should be able to see something like this:
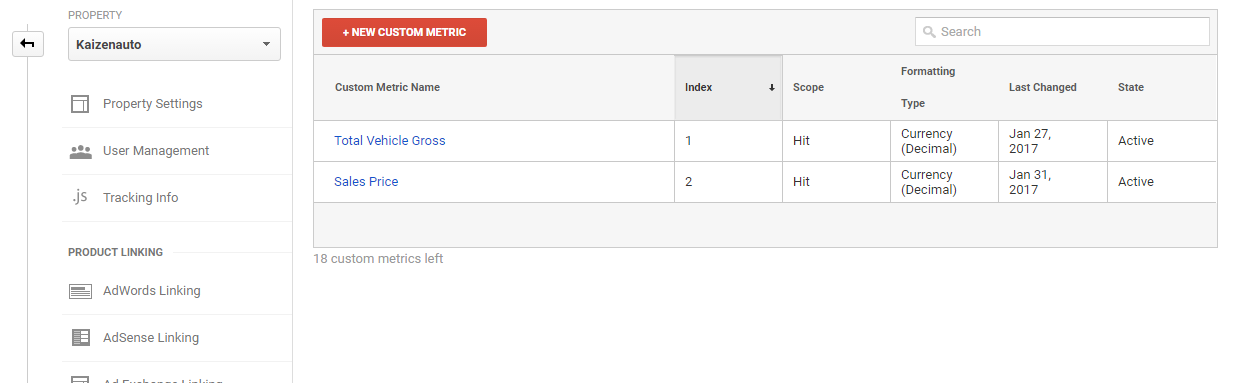
Screenshot 5
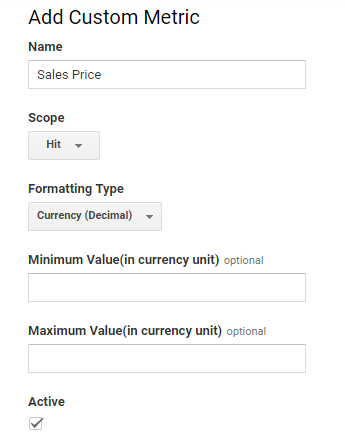
Then open the same page in the destination property and apply the same steps as for the custom dimensions: copy metrics one by one, while making sure that index, scope and state is the same.
For metrics you should also pay attention to the “Formatting Type”. It should match in source and destination properties too (usually it’s “Currency (Decimal)”).
Screenshot 6
4. Copy goals.
Go to Google Analytics – Admin, and select the view from which you want to copy goals. In that view, click “Goals” and you should see this page:

Screenshot 7
Then select the checkbox on the top left. This way you’ll select all the goals you want to copy to the destination properties. You can also un-select the ones you don’t want to copy.
Then click “Share”, choose “Share Template Link” and click “Share”:
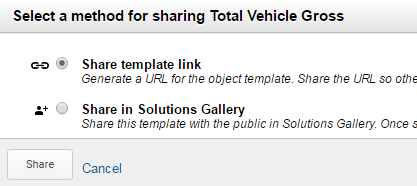
Screenshot 8
Copy the URL that appears:
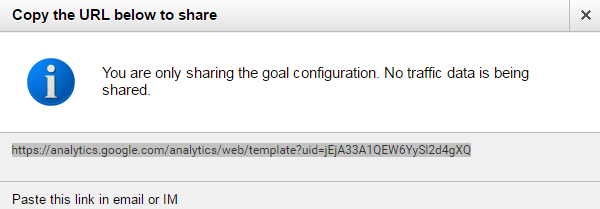
Screenshot 9
Then open this link in a new browser tab, select the destination view and click “Create”:
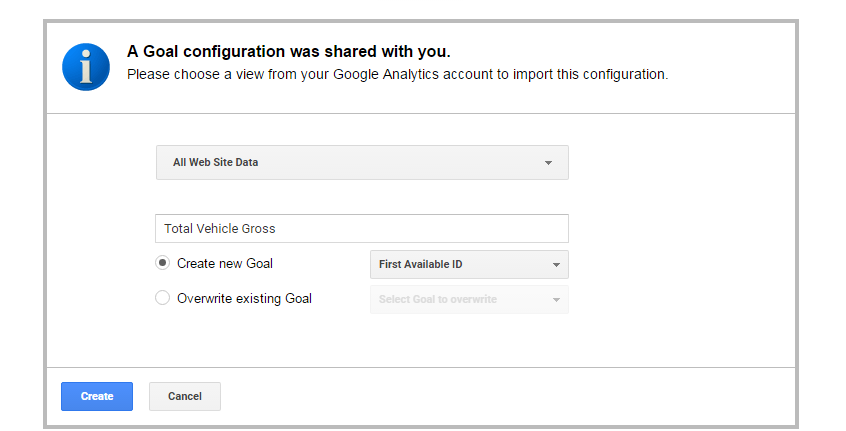
Screenshot 10
If there are no errors, now the goals are copied to the destination views and the setup is complete.

